Sidewalk Paver Installation
Sidewalk paver installation transforms ordinary walkways into stunning outdoor spaces. This guide delves into the multifaceted world of paver selection, installation techniques, and design considerations, empowering you with the knowledge to create a beautiful and durable pathway. We’ll explore various paver materials, from classic brick to modern permeable options, comparing their aesthetics, durability, and cost-effectiveness. Understanding the installation process, from base preparation to final finishing, is crucial for a successful project, and we’ll cover that in detail, including essential tools and safety precautions. Finally, we’ll address common challenges and offer troubleshooting solutions, ensuring your project’s success.
Whether you’re a homeowner embarking on a DIY project or a professional seeking to refine your techniques, this comprehensive guide provides valuable insights and practical advice to achieve outstanding results. From selecting the perfect pavers to crafting a visually appealing design, we’ll equip you with the knowledge to navigate every step of the process confidently.
Types of Sidewalk Pavers
Choosing the right sidewalk pavers is crucial for both aesthetic appeal and long-term durability. Several materials offer distinct advantages and disadvantages, impacting cost, maintenance, and overall lifespan. Understanding these differences is key to making an informed decision for your project.
Paver Material Comparison
The following table compares common sidewalk paver materials based on durability, cost, aesthetic appeal, and maintenance requirements. Cost estimates are approximate and can vary based on location and supplier.
| Material | Durability | Cost (per sq ft) | Aesthetic Appeal | Maintenance |
|---|---|---|---|---|
| Concrete | High; resistant to cracking and wear with proper installation | $3-$8 | Versatile; available in various colors, textures, and finishes | Low; occasional cleaning and sealing |
| Brick | High; durable and long-lasting, but susceptible to chipping | $5-$15 | Classic and timeless; offers a wide range of colors and patterns | Moderate; occasional cleaning and repointing may be needed |
| Natural Stone (e.g., granite, flagstone) | Very High; extremely durable and weather-resistant | $10-$30+ | Elegant and sophisticated; provides unique visual appeal | Low; minimal maintenance required |
| Permeable Pavers | Moderate to High; depends on material and installation | $6-$12 | Modern and environmentally friendly; available in various materials and colors | Moderate; requires regular cleaning to maintain permeability |
Paver Patterns and Designs
Paver patterns significantly impact the overall visual appeal of a sidewalk. Simple patterns like running bond or herringbone are relatively easy to install, while more complex designs like basketweave or fan patterns require greater skill and precision. The choice of pattern should align with the overall design aesthetic and the desired level of visual complexity.
- Running Bond: A simple and classic pattern where pavers are laid in parallel rows with staggered joints. Easy to install and visually appealing.
- Herringbone: Pavers are laid in a V-shaped pattern, creating a more intricate and visually interesting design. Requires more precision during installation.
- Basketweave: Two pavers are laid perpendicularly to create a woven effect. Moderately complex to install, but visually striking.
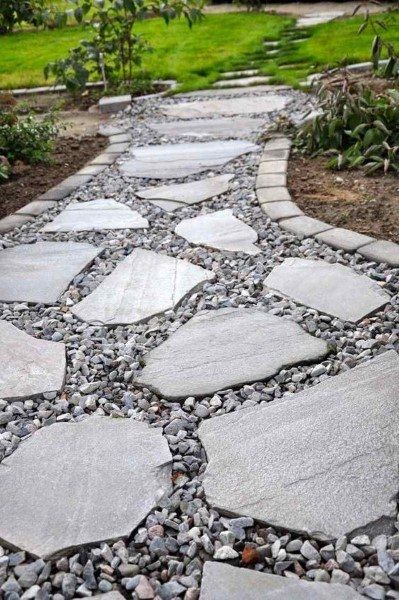
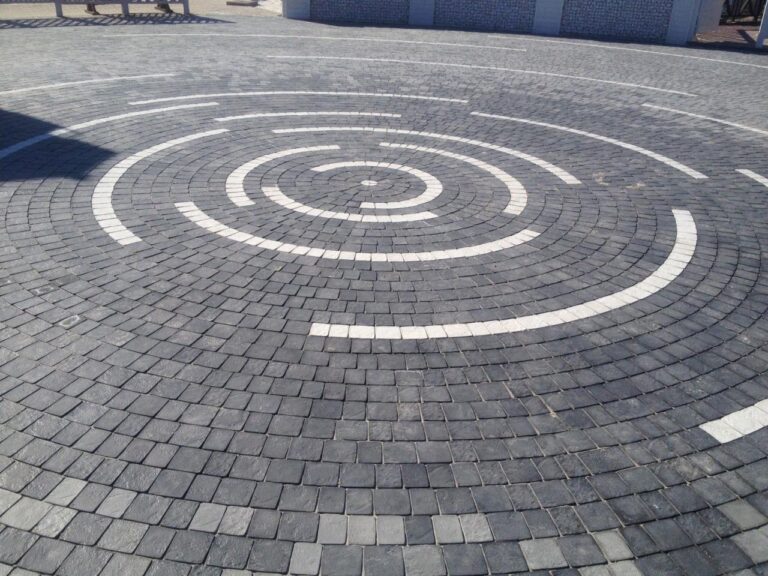
- Circular Patterns: Curved pathways or patios can be created using radial patterns, which are more challenging to install but offer a unique and elegant look.
Paver Suitability for Different Applications
The ideal paver type depends on the specific application. High-traffic areas benefit from durable materials like concrete or natural stone, while residential walkways may allow for more aesthetically focused choices with slightly lower durability. Commercial spaces often prioritize durability and ease of maintenance.
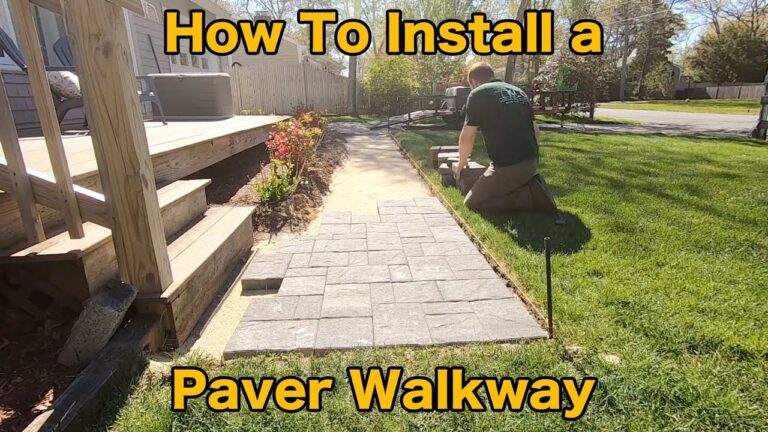
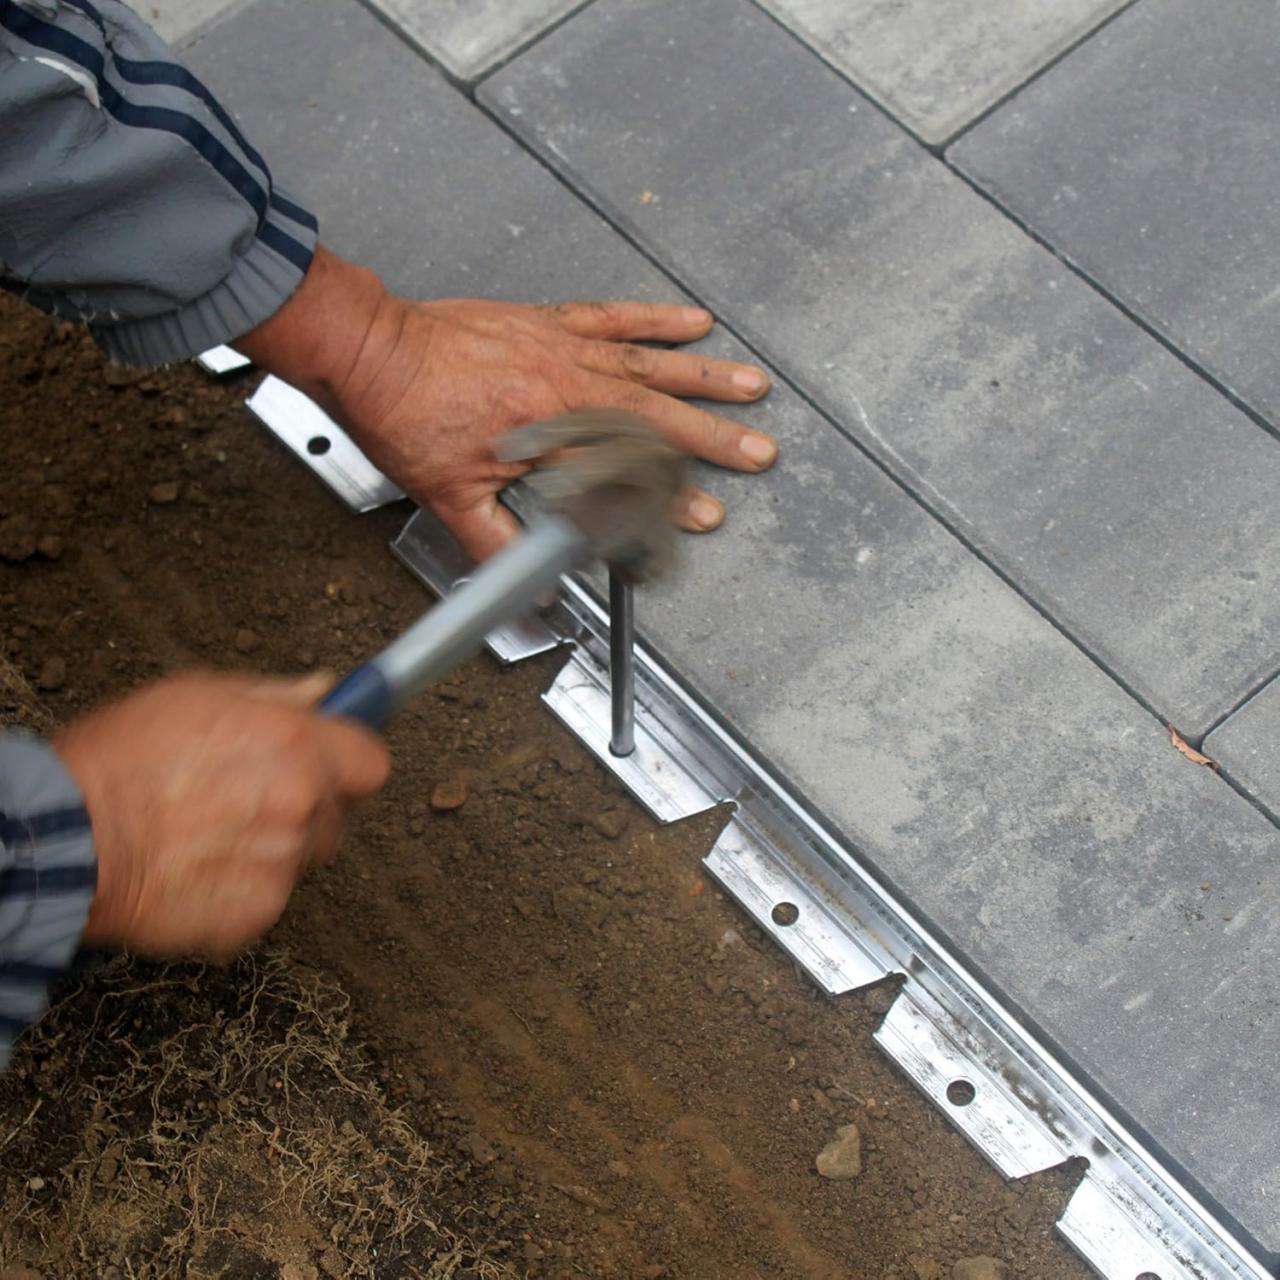
Sidewalk Paver Installation Process
Proper installation is essential for a long-lasting and aesthetically pleasing sidewalk. The process involves several key steps, from careful site preparation to final finishing touches.
Step-by-Step Installation
Source: westerninterlock.com
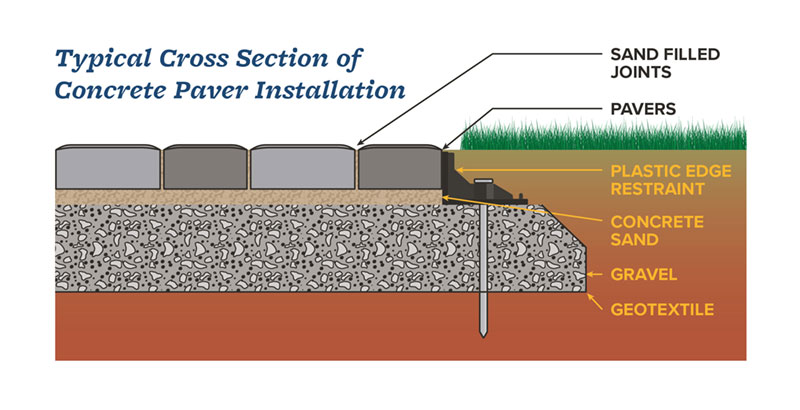
- Site Preparation: Excavate the area to the required depth, ensuring a level and compacted base. This is crucial for preventing settling and ensuring paver stability.
- Base Preparation: Lay a compacted gravel base, followed by a layer of sand or bedding material. This provides a stable and even surface for the pavers.
- Paver Laying: Begin laying pavers, ensuring proper spacing and alignment. Methods include dry-laid (without mortar) and mortared (with mortar for increased stability).
- Compaction: Compact the pavers using a plate compactor to ensure a level and stable surface. Avoid over-compaction, which can damage the pavers.
- Joint Filling: Fill the joints between pavers with joint sand or polymeric sand to prevent weed growth and stabilize the paver surface.
- Final Finishing: Sweep away excess sand and clean the paver surface. Apply a sealant (optional) to enhance protection and appearance.
Base Preparation Importance
Source: SSL-images-amazon.com
A properly prepared base is the foundation for a successful sidewalk paver installation. Improper base preparation can lead to uneven settling, paver shifting, and cracking, significantly reducing the lifespan of the project. Compaction is key to ensuring a stable base that can withstand the weight and movement of pedestrians and vehicles.
Dry-Laid vs. Mortared Installation, Sidewalk paver installation
Dry-laid installation involves laying pavers directly onto a sand bed, offering flexibility and easier repairs. Mortared installation, using mortar between pavers and the base, provides superior stability and is ideal for high-traffic areas. The choice depends on the specific project requirements and anticipated load.
Tools and Equipment
Having the right tools and equipment is crucial for efficient and safe sidewalk paver installation. This includes power tools for excavation and compaction, as well as hand tools for precise placement and finishing.
Essential Tools and Equipment
- Excavator/Shovel: For digging and removing existing materials.
- Plate Compactor: For compacting the base and pavers.
- Wheelbarrow: For transporting materials.
- Measuring Tape and Level: For accurate measurements and leveling.
- Rubber Mallet: For gently tapping pavers into place.
- Hand Tamper: For compacting the base in smaller areas.
- String Line: To ensure straight lines during installation.
- Joint Sand/Polymeric Sand: To fill the gaps between pavers.
Safety Precautions
Always wear appropriate safety gear, including safety glasses, gloves, and hearing protection, when using power tools. Lift heavy materials correctly to avoid back injuries. Follow the manufacturer’s instructions for all tools and equipment.
Compactor Types

Source: patiomen.com
Different compactors are suited for various soil conditions. Plate compactors are versatile and suitable for most residential projects, while larger, more powerful compactors are necessary for large commercial projects or challenging soil conditions.
Challenges and Troubleshooting: Sidewalk Paver Installation
Several challenges can arise during sidewalk paver installation. Understanding these potential issues and having solutions in place can help ensure a successful project.
Common Problems and Solutions
Uneven surfaces, settling, and frost heave are common problems. Addressing these issues promptly is crucial for a long-lasting installation.
| Problem | Solutions |
|---|---|
| Uneven Surfaces |
|
| Settling |
|
| Frost Heave |
|
Repairing Damaged Pavers
Damaged or cracked pavers can be repaired by carefully removing the affected paver and replacing it with a new one, ensuring proper alignment and compaction.
Design Considerations

Source: ytimg.com
Creative and functional sidewalk paver designs can enhance the overall aesthetic appeal of any space. Careful planning is essential to ensure a successful and aesthetically pleasing outcome.
Creative Paver Designs
Curved walkways create a more natural and inviting feel. Geometric patterns add visual interest while incorporating different paver colors and textures can add depth and dimension. Consider using different-sized pavers to create unique designs. A patio area might use larger pavers for a more spacious feel, while a pathway could use smaller ones for a more defined look.
Accessibility Requirements
Adhering to ADA (Americans with Disabilities Act) guidelines is crucial for ensuring accessibility. This includes maintaining proper slopes and providing sufficient space for wheelchair access. Appropriate tactile paving can improve navigation for visually impaired individuals.
Integrating Landscaping Elements
Integrating landscaping elements, such as plants and lighting, can enhance the overall design. Plants can soften the hardscape and add color, while lighting can create ambiance and safety at night. Careful consideration of plant placement is crucial to prevent damage to the pavers.
Cost Estimation and Budgeting
The cost of a sidewalk paver installation project is influenced by several factors, including material selection, labor costs, and site preparation. Careful planning and budgeting are essential to manage costs effectively.
Factors Influencing Cost
Material costs vary significantly depending on the type of pavers chosen. Labor costs depend on the project’s size and complexity. Site preparation costs depend on the existing conditions and the amount of excavation required. Permits and inspections also contribute to the overall cost.
Sample Cost Breakdown
| Item | Cost (Estimate) |
|---|---|
| Materials (Pavers, Sand, Gravel) | $500 – $2000 |
| Labor | $1000 – $4000 |
| Site Preparation | $200 – $800 |
| Permits and Inspections | $100 – $500 |
Note: These are rough estimates and actual costs can vary significantly based on location, project size, and other factors.
Cost Management Strategies
Careful planning, obtaining multiple quotes from contractors, and considering alternative materials can help manage costs. Prioritizing essential aspects of the project and potentially delaying less critical features can also help stay within budget.
Q&A
What is the average lifespan of sidewalk pavers?
The lifespan varies greatly depending on the paver material, installation quality, and environmental factors. High-quality pavers, properly installed, can last for 20 years or more.
How much does it cost to remove existing pavement before installing pavers?
Removal costs depend on the type and depth of existing pavement, its area, and labor rates in your region. Expect to pay extra for specialized equipment if dealing with concrete.
Can I install the pavers myself, or should I hire a professional?
While DIY is possible for smaller projects, professional installation is recommended for larger areas or complex designs to ensure proper base preparation and long-term durability.
How do I maintain my sidewalk pavers?
Regular sweeping and occasional power washing will keep your pavers looking their best. Address weeds promptly and consider sealing porous pavers to prevent staining.
What are the permitting requirements for sidewalk paver installation?
Permitting requirements vary by location. Check with your local authorities before starting the project to avoid potential fines or delays.